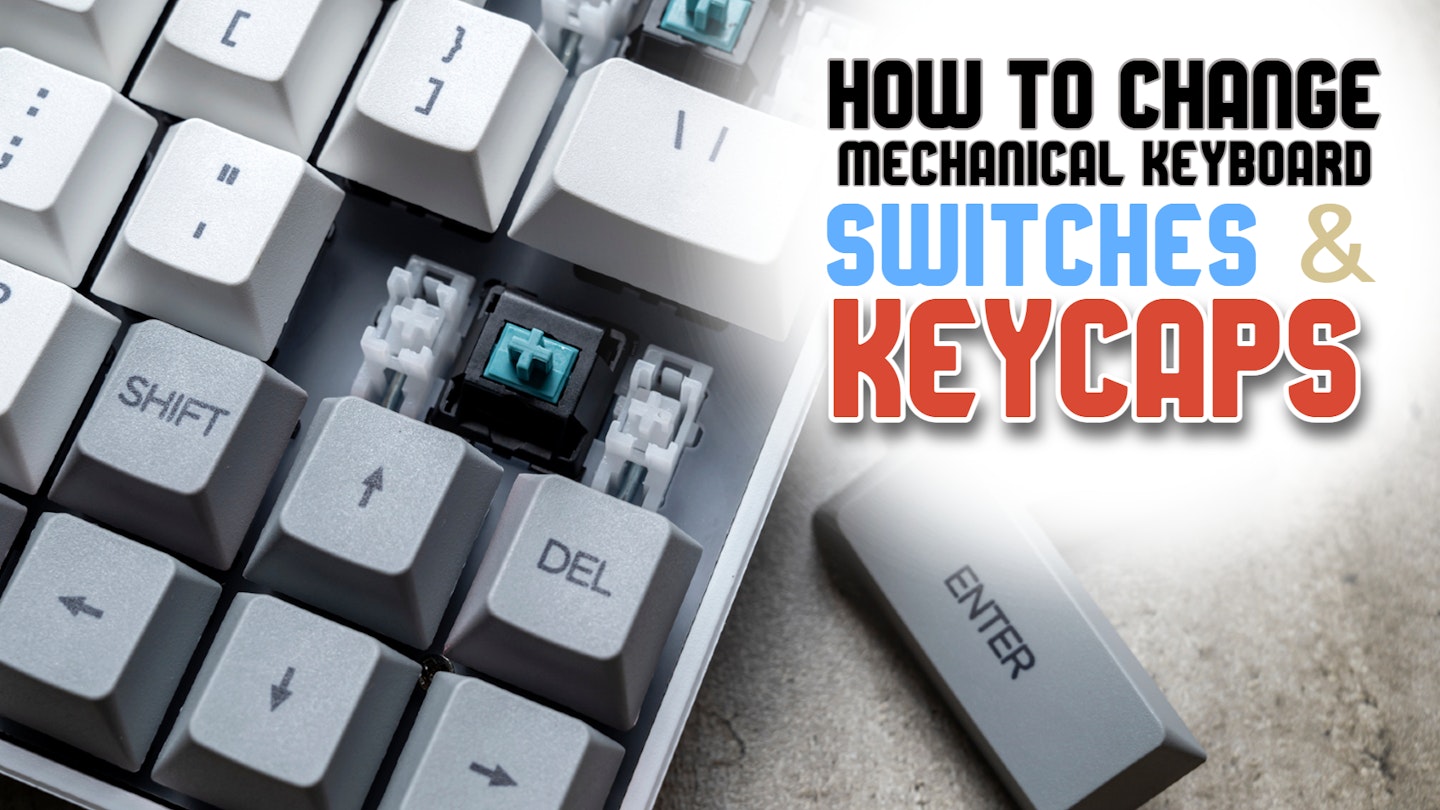
Take a look at your mechanical keyboard - it may have been one of the best keyboards known to man when you first bought it, but is that still true today? Perhaps the keycaps are worn or scratched, or the keys feel spongey with presses that don’t give much feedback. Or, maybe you just fancy a change? Thankfully, mechanical keyboard switches are engineered for precision and tactile response - and they're also easy to change for better ones.
What makes your mechanical keyboard worth investing in is the overall experience - they make for fast and accurate typing, gaming and general-use PC keyboards. With excellent variations in available switch types, they also offer softer or harder feedback, linear action and quieter or louder clicks for controlling noise levels.
This may seem like the keyboard equivalent of open-heart surgery to a newcomer - that’s where our expert guide comes in. We’ve also included a quick guide to switches and some FAQs at the end of the article to help. Rest assured, giving your mechanical keyboard a bit of a makeover and key upgrade is a lot easier and faster than you think and requires no special skills. So, let’s get started.

Before you start
Photograph your keyboard before you remove anything. It’s all too easy to fly at a job like this without paying attention to the layout of the keys. It’ll make it so much easier later if you have a quick photo to refer to.
Get some supplies
The tools and supplies you need for this are cheap and readily available. Here’s what you need:
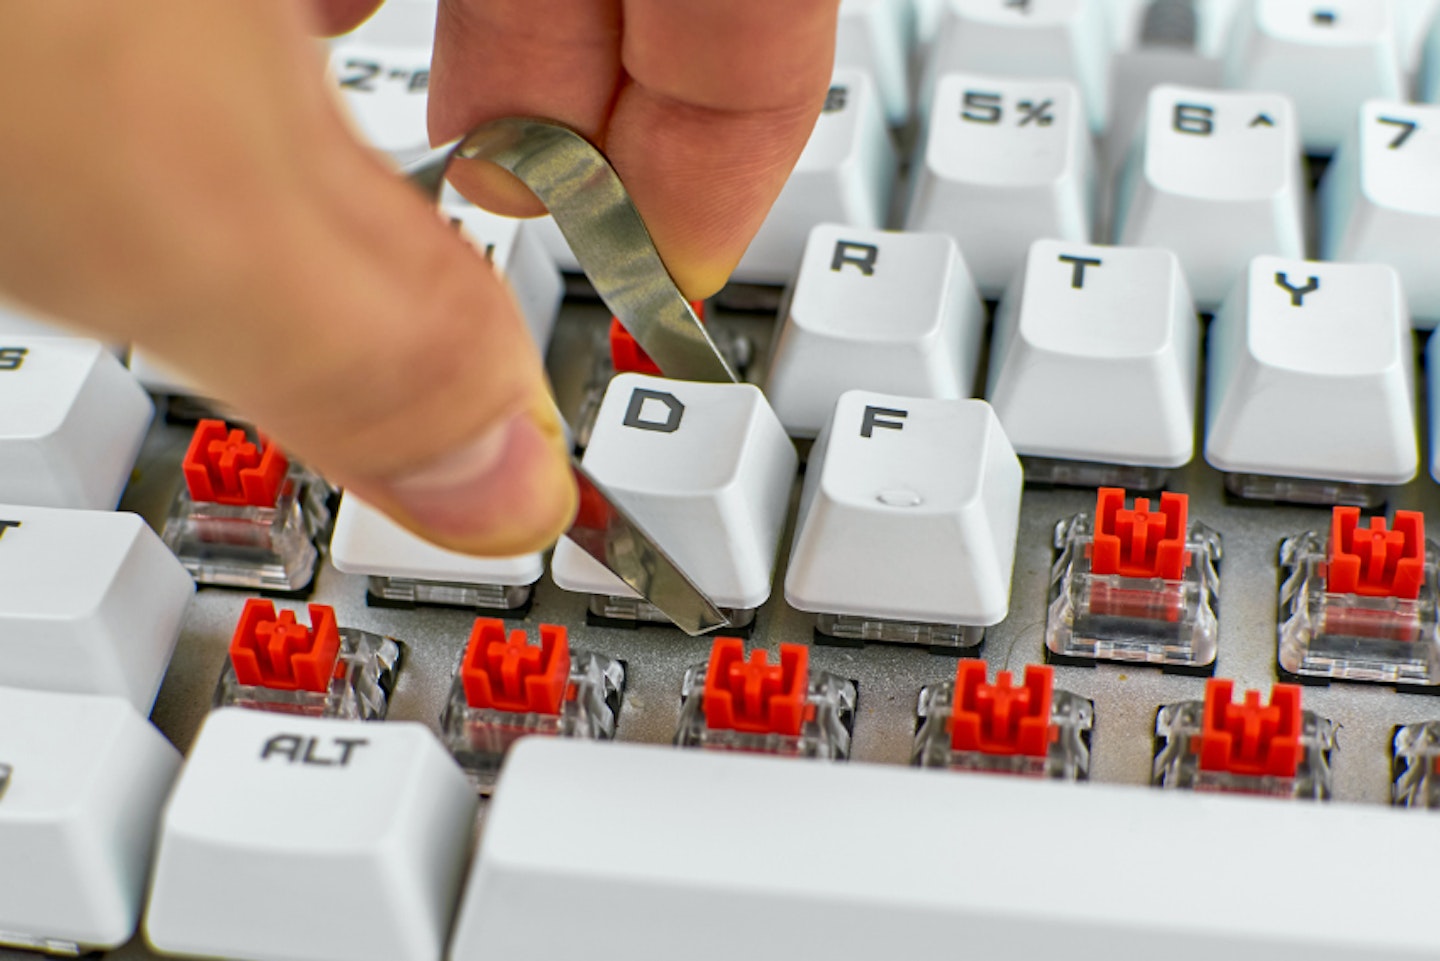
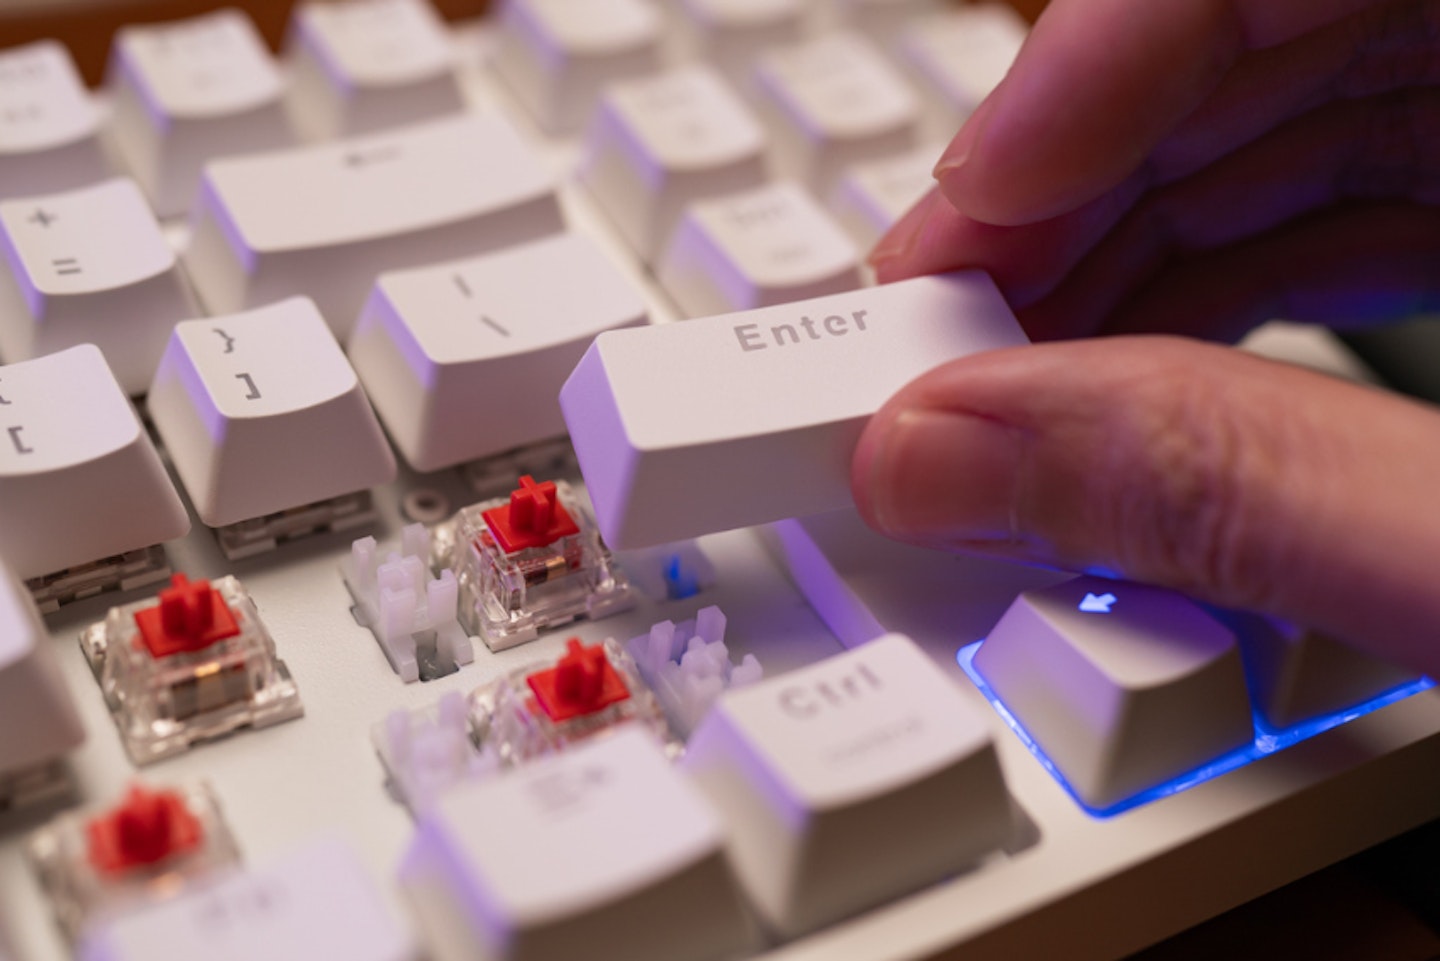
Keycap puller
This is a tweezer-like tool, sometimes made of metal or plastic, that simply clips underneath each key and enables it to be easily removed without straining the keycap or the switch underneath. They’re cheap and often come included with keycap sets. Don’t be tempted to use your fingers or household tools like cutlery to do this - you’ll put a strain on the keyboard and risk damaging it or even injuring yourself.
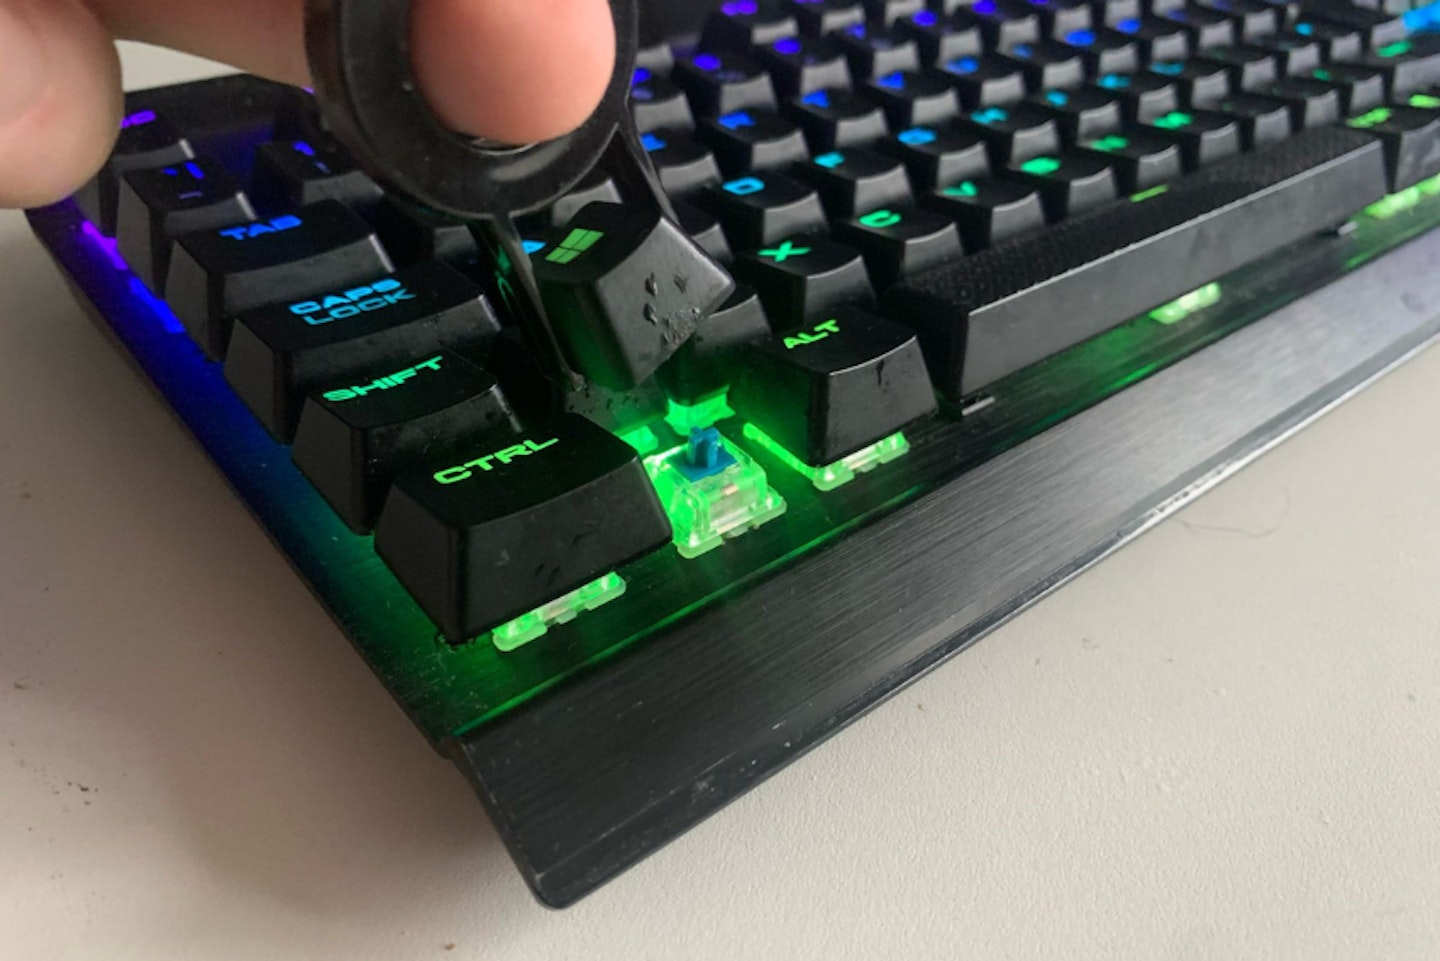
Switch puller
Much the same as the keycap puller above (some of which double up as a switch puller), this is a small tool that can grip the switch and allow it to be pulled from the socket safely.
Cleaning tools:
• A clean lint-free cloth.
• Some cotton buds / Q-tips.
• Some isopropyl alcohol (IPA) that’s formulated for computer cleaning.
• A can of compressed air or a handheld keyboard/computer vacuum cleaner.
Lastly, if your keycaps need a thorough clean, some warm soapy water and a soft brush.
How a mechanical keyboard works
But before we dive in and start modifying things, it’s worth looking at how a mechanical keyboard works. Not all of us know about the keyboard tech underneath those worn keycaps, and having a bit of a grounding in it will help newcomers have the confidence to start what might seem like a daunting task.
Unlike a traditional budget keyboard that has a sprung keycap mechanism that presses down on a rubber membrane, a mechanical keyboard uses self-contained mechanical switches that are either soldered onto the keyboard’s circuit board (fixed) or slotted into sockets on the board. The latter is known as ‘hot-swappable’ and is the only type that’s easily modified in terms of a new set of switches. As the name suggests, it enables anyone to easily swap their switches for a new set for a different feel and sound.
The advantage of mechanical switches over membrane keyboards is that the mechanism is finely engineered for reliable key activation and offers a more precise amount of travel when pressed. Some can even be fine-tuned for bespoke travel and activation settings using software. Most are wired, but many are now wireless keyboards with low latency and anti-ghosting for gaming, typing and more.
Keeping your switches but replacing your keycaps?
Despite most mechanical keyboards being compatible with a wide range of switches, the case isn’t the same with keycaps. You will need to carefully check the specifications of your switches to make sure that the stem will fit your new keycaps. As long as they’ll fit, you’re good to go.
How to replace your keycaps
As mentioned above, your main tools here will be some cloths, some cotton buds and some IPA. And don’t forget a decent keycap puller. Yes, it’s just about possible to remove a keycap with your fingers - but it’ll put too much strain on the switch and the cap. It’s far better and safer to buy a simple but well-designed keycap puller.
1. Remove all of the keycaps
The puller will normally have notches that will click once they reach the underside of the keycap. Gently pull up vertically and the cap will come loose. You may need to move the puller from side to side on the more stubborn ones.
2. Clean
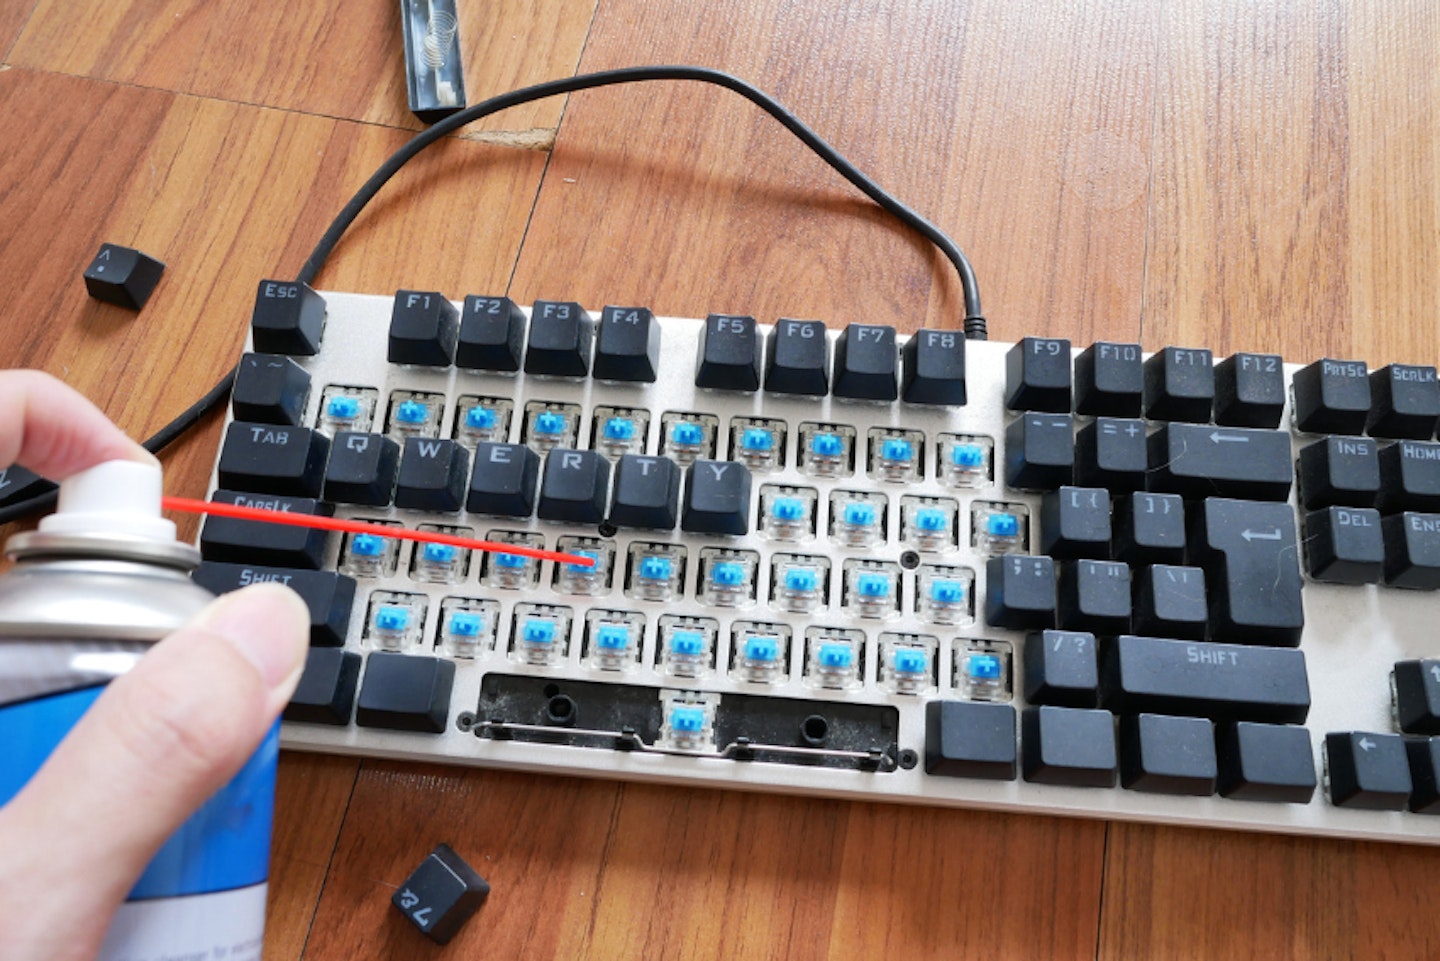
With the caps out of the way, tip the keyboard upside down and give it a gentle tap or three. This will dislodge the worst of the crumbs or dirt first.
Then use a low-power handheld keyboard vacuum or a can of compressed air to tackle the bulk of the dust and fibers. Do not use a household vacuum cleaner - it’s too powerful and hard to control - you could lose some switches that way too.
If there’s any stubborn dirt left on the casing or switches, use a cotton bud and a small amount of IPA to remove it. Finally, give everything a wipe-over with a lint-free cloth.
3. Fit the new keycaps (or refit the old ones)
With the switches and keyboard case all shiny and looking like new, it’s time to line up your new keycaps and slot them into place. Using the photo you took earlier as a guide, slot them onto the switch stems. They should fit without excessive force, so if one won’t go on don’t force it - check the switch stem and of course the cap for any problems.
Of course, you could just clean and refit the old ones - tips on that are below. It’s a cheap way of giving your keyboard a bit of a refresh - plus, if your keyboard has any design quirks, you won’t have any compatibility issues.
How to swap out your keyboard switches
1. Clean the case before you pull the switches
Following the same cleaning advice above, prepare the keyboard for the new switches. But why do this with the switches in place? Well, firstly you’re stopping any dirt from getting deeper into the keyboard once the old ones are removed. Plus, you’re preparing the casing for the new switches so that they slot in nicely and cleanly.
2. Install the new switches
Use a switch puller (often, but not always provided with a new switch set) to pull the switches out of each socket. It should snap into place on either side of the switch. Pull up vertically - don’t twist or pull from an angle.
Setting the old switches aside, grab the new set and slot them into place, paying special attention to inserting them the right way around. Most switches are either north or south-facing in the socket. You can tell by looking at the pins inside - they will need to match the corresponding holes in the underside of each switch.
Once installed, some users and brands advocate using key switch lubrication to make the action even smoother. Although, not all switch brands are suitable for this, so check the details first.
3. Clean those old keycaps (if you're not replacing them)
Now back to the keycaps themselves. Fit any new keycaps using the same method as we described above. But, if you are keeping your old ones, you might be lucky and find they only need a wipeover with a damp cloth, or a bit of TLC with a cotton bud and some IPA on the touch spots. But again, if they’re particularly nasty you might want to soak them in warm soapy water and use a soft brush to clean them properly. Rinse them with clean water and leave them to air-dry completely.
4. Fit your keycaps
Lastly, slot your keycaps back into place on your lovely new switches and enjoy your refreshed and responsive mechanical keyboard. But don’t forget to check out some of the best keyboard cleaning supplies if you want to keep it that way.
A quick guide to switch types
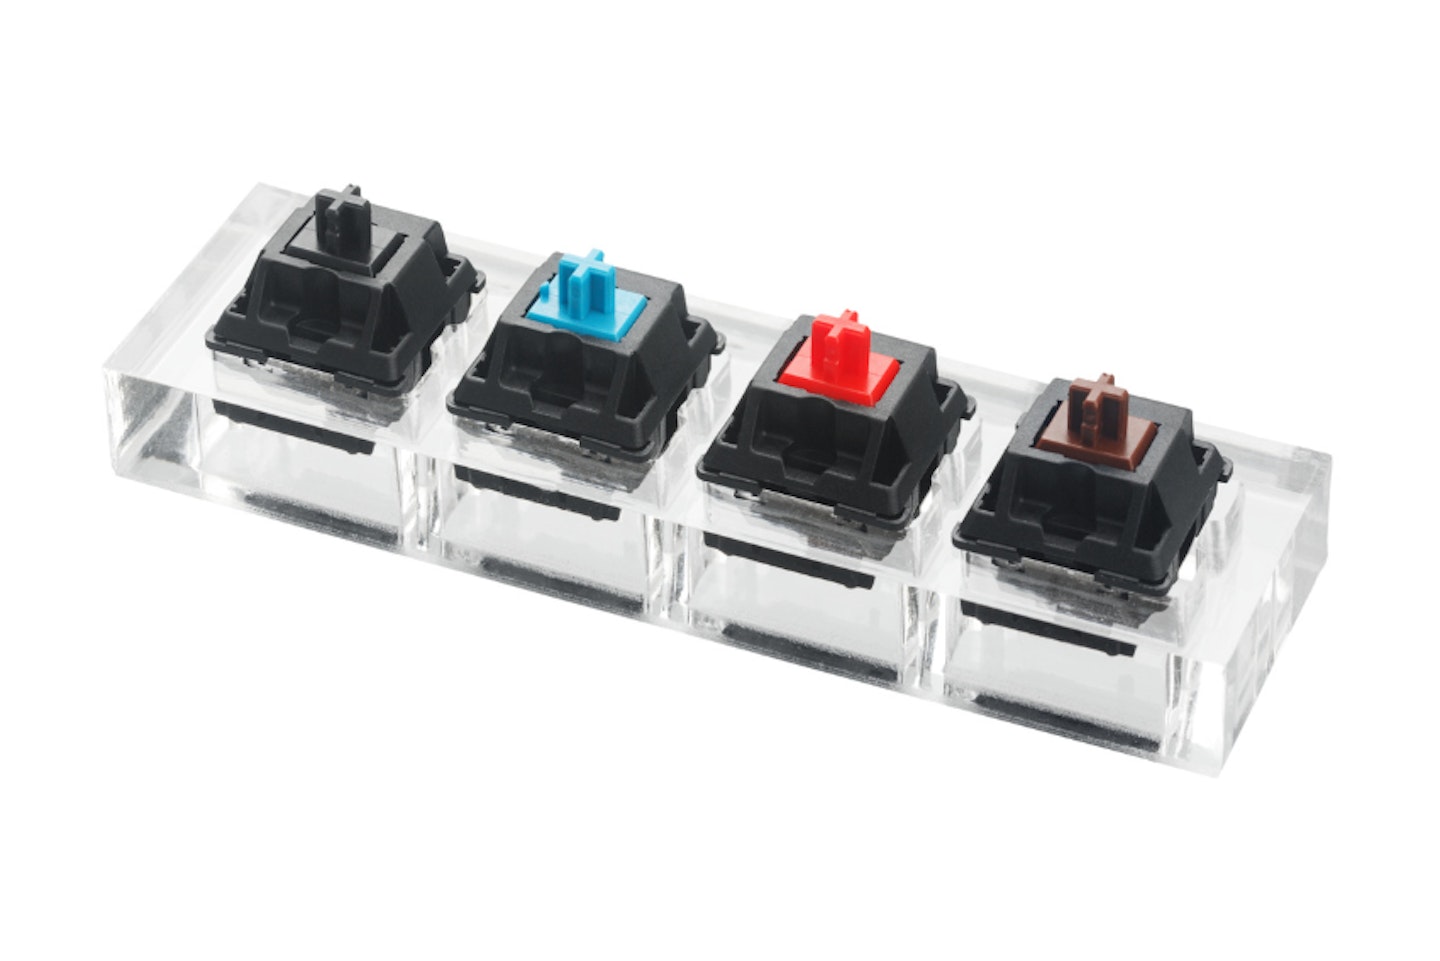
Typically, mechanical keyboards with hot-swappable switches use a standard switch design that fits the socket in the keyboard. But, not all switches are interchangeable. There are several brands and designs that often aren’t compatible with each other, such as Cherry MX, Topre and ALPS switches. So, check which ones your keyboard uses before you buy.
No matter which brand you buy, you still have a lot to choose from in terms of look, feel, tactile response and more. These are often colour-coded based on their features (for example, Cherry MX Brown or MX Red). All switches fall into three broad categories:
Linear switches
As the name suggests, when pressed the stem of the switch travels smoothly from top to bottom at maximum speed - at which point the keypress will actuate. It makes this a great switch choice for high-response times and fast reactions.
Tactile switches
Unlike linear, tactile switches have more controlled resistance to each keypress. There’s often a tactile sensation as the key travels, letting you know it’s being pressed throughout the action. This feedback usually results in a sound to let you know the keypress has been completed, too.
Clicky switches
Much like the above, clicky switches are tactile but with various loudnesses and pitches of click. If you like a more satisfying ‘typist-style’ experience, there’s a clicky mechanical switch for you.
Low-profile mechanical keyboards
What about low-profile mechanical keyboards? Well, they’re less common, but there are some hot-swappable low-profile mechanical models on the market. They might look a lot like a typical chiclet-type keyboard, but they have ultra-compact mechanical or optical switches underneath. If they’re hot-swappable, the switch removal and replacement procedure will be similar - but check to make sure you don’t need a different type of key-puller.
What about a low-profile ‘chiclet’ keyboard
Don’t get the above confused with a common low-profile ‘chiclet’ keyboard. These use scissor-switch style keys, much like theLogitech MX Keys we reviewed. In most cases, these are not hot-swappable and (although technically mechanical) are engineered completely differently. Also, removing the keycap from a low-profile chiclet key isn’t recommended due to the small and breakable parts inside.
FAQs
Is it safe to remove keycaps from mechanical keyboards?
Yes, but again you should avoid using household tools (or dangerous items like cutlery) to do this. A keycap should be pulled from underneath and equally from both sides. Keycap pullers are extremely cheap, so we recommend you always use one. If you’re buying new switches or keycaps, some brands throw a keycap puller into the package for you.
Keep in mind, though, that if you buy one of the best ergonomic keyboards with mechanical keys, they may have some non-standard keycaps. Some may have special ergonomic shapes to fit the overall design and layout. If that’s the case, you may not be able to replace them so easily.
Can mechanical keyboard switches be replaced?
Yes - most can. But not all of them are easily replaced. Although it’s possible to replace the fixed switches on a keyboard without sockets, you’ll need a soldering iron and some know-how to attempt this. We only recommend replacing switches on hot-swappable keyboards. Some of the best models are mechanical keyboards for gamers - and that means they’re designed to take some punishment; So, wearing out a key or just replacing switches for a faster response time is all part of the design.
How long should mechanical switches last?
Although this depends from brand to brand, most are rated at well over ten years under average use. For anyone who wants more accurate numbers here, many manufacturers will rate their switches based on the number of keypresses they can handle in their lifetime - normally measured in the millions. That said, heavy users of keyboard shortcuts may find they wear some key switches out faster than others - but at least they’re easily replaced.
Chris Duffill is a Tech Product Writer for What's The Best. His background includes writing, editorial, marketing, design, video production and photography.
He specialises in home entertainment and audiovisual tech, including speakers, amplifiers, turntables, streaming media players, and TVs. He is also one of our resident experts in computing (PCs, tablets, smartphones, smartwatches), DSLR photography and all kinds of digital cameras. He also writes about retro gaming, game consoles and various electronic gadgets. If it plugs in, lights up or makes a noise, he’ll write about it.
Subscribe to the What’s The Best Newsletter to keep up to date with more of the latest reviews and recommendations from the rest of the What’s The Best team.