Do you need an ice cream maker? Probably not, no. But ice cream isn’t about ‘need’. It’s about WANT. And if you love ice cream, then you want an ice cream maker.
Yes, it’s probably just as easy, and cheaper, to go to the shops and buy a tub of ice cream. But it’s not as much fun as making your own. Having an ice cream machine at home means you can dream up all sorts of fantastic flavours that even Ben & Jerry haven’t thought of yet. And, when you’re craving ice cream at 11pm, switch on your machine and in half an hour you’ll have a tasty treat, no shopping trip required.
You can spend a lot of money on an ice cream machine, or you can buy a cheaper version, but the more you spend the better the result. Like everything in life, then.
We’ve tested some of the best ice cream machines on the market, to help you choose which one will suit your ice cream needs.
The Best Professional Ice Cream Maker
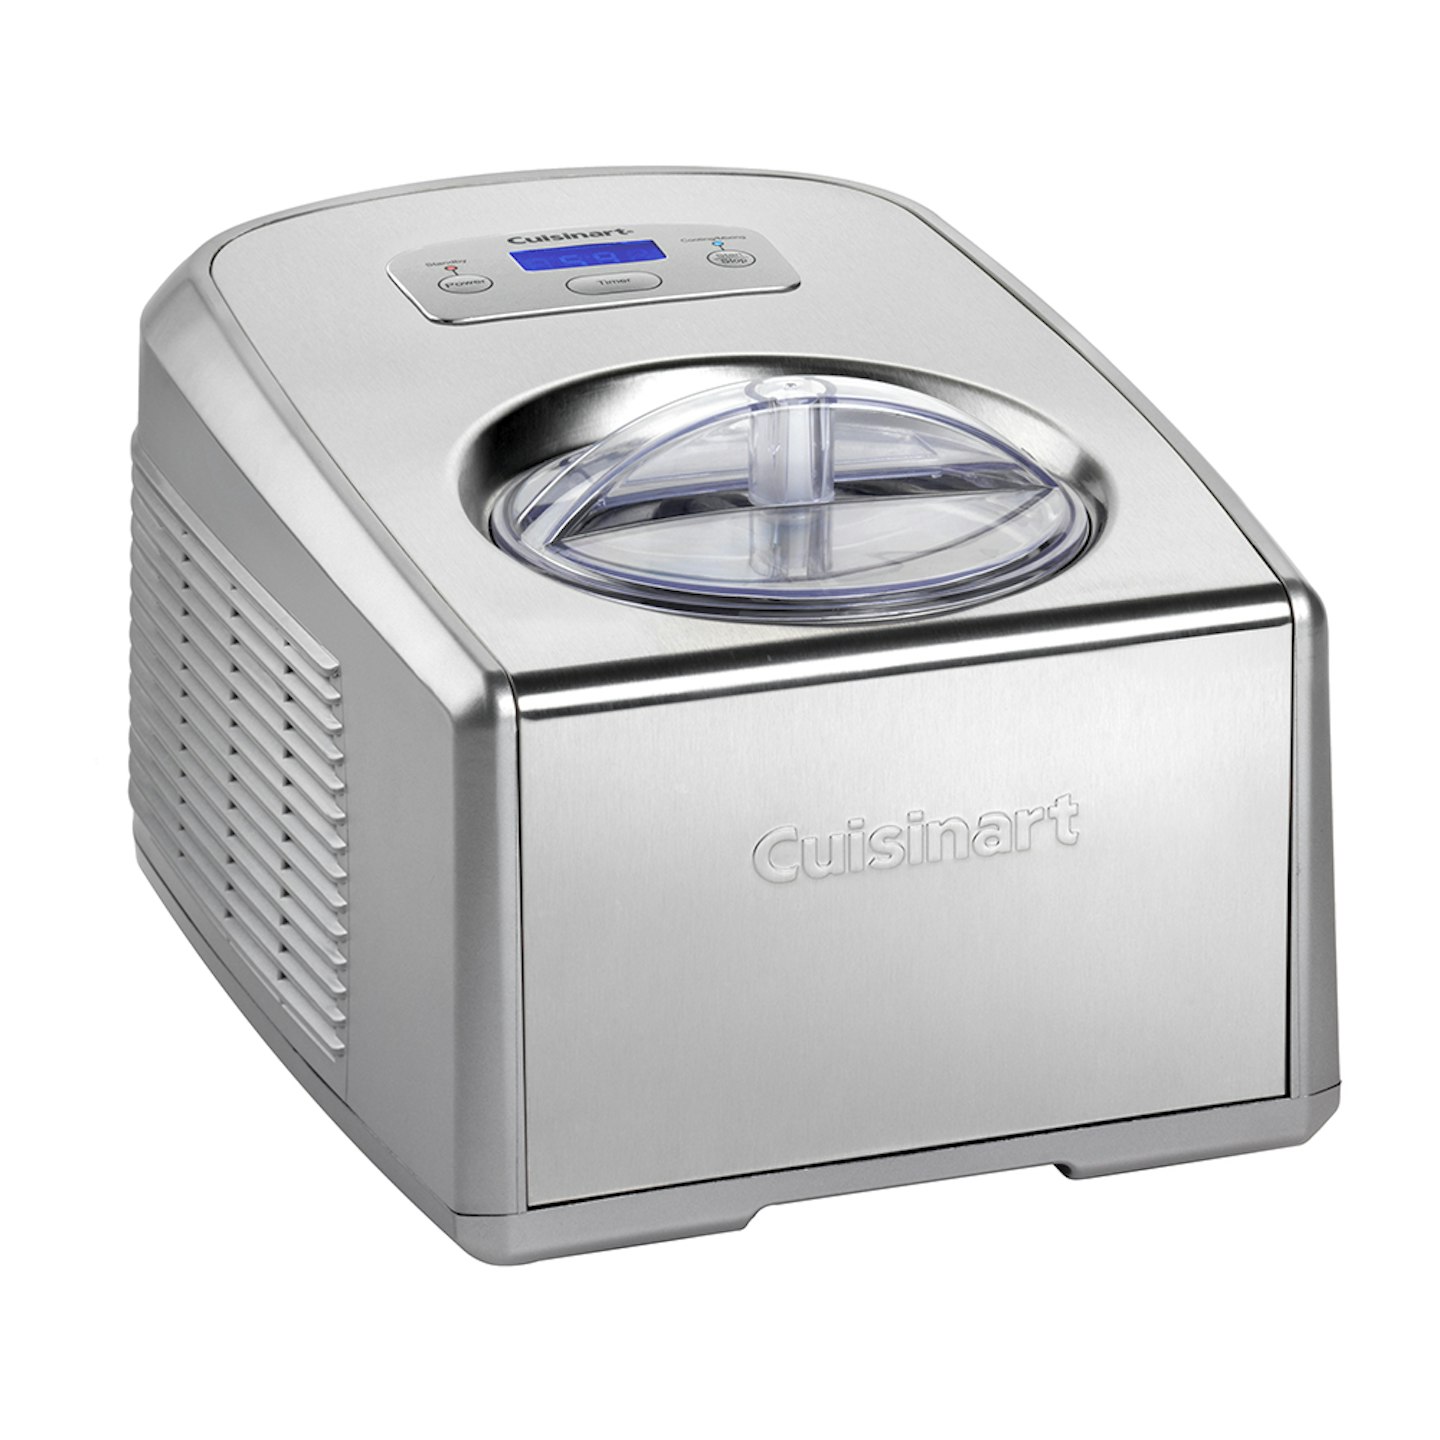
ao.com
Specs:
• 1.5 litre capacity
• Window lets you check on your ice cream as it churns
• Timer to let you know when ice cream is ready
• No need to pre-freeze
• 5-year warranty
Cuisinart Ice Cream Maker: Review
The Cuisinart is a serious ice cream maker for serious lovers of ice cream. It’s by far the easiest machine to use; you just plug it in, pour in your ingredients, set the timer, put the lid on, and leave it to work. It’ll beep when the ice cream is ready – you can set the timer depending on the texture you want, or whether it’s ice cream or sorbet. There’s a separate paddle for sorbet, too. There’s no need to pre-freeze any of the equipment, so if you’ve got the ingredients, you can have ice cream in about 35 minutes. The bowl is generous, too, meaning you can make up to 1.5 litres of ice cream.
The ice cream was smooth and consistent in texture throughout.
However, obviously there is a cost attached to this, and it’s not exactly cheap – this really is an investment gadget. We worked out that if you ate four tubs of ice cream (priced at £4 a tub, which is about average for Ben & Jerry’s) every month, the ice cream maker would pay for itself within five years (based on the ingredients costing about £3). So, you have to really, really love making your own ice cream.
But, even given the price, this comes really highly recommended. It’s so easy to use, you don’t have to think about preparing everything a day in advance, and it works effortlessly. Costly, but worth it.
It does take up a lot of room on your work surface though (I actually keep it in the garage where there’s extra space).
The Best Gadget Attachment Ice Cream Maker
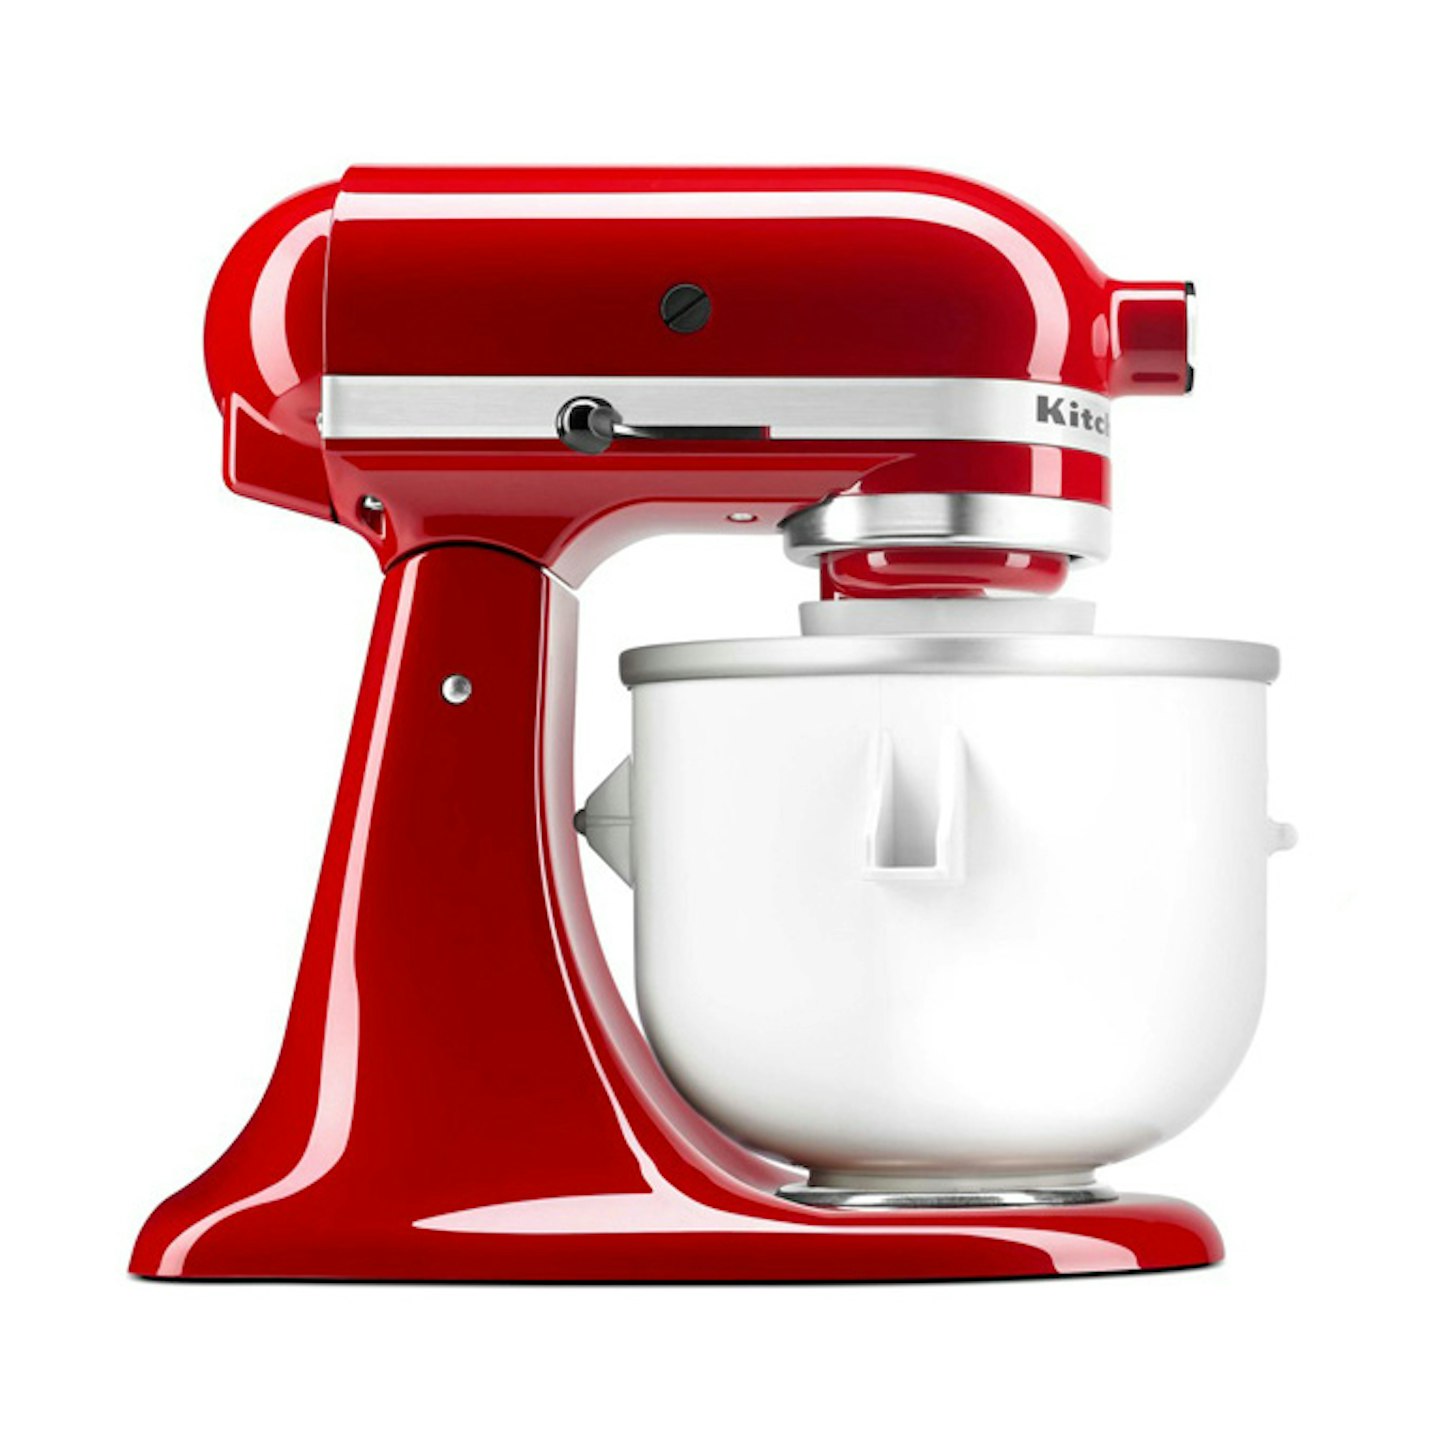
www.kitchenaid.co.uk
Specs:
• Only compatible with the 4.3L and 4.8L KitchenAid Tilt-Head Stand Mixers
• 1.9 litre capacity
• Pre-freeze the bowl for at least 12 hours
KitchenAid Ice Cream Maker Attachment: Review
This gadget attaches to your KitchenAid stand mixer, using a special attachment that hooks over the motor head of the beater shaft. The bowl is large – allowing you to make up to 1.9 litres of ice cream. You freeze the bowl in your freezer at least 12 hours before making the ice cream; lock it into place on your mixer, with the paddle (called a ‘dasher’) in place, and turn on the mixer on the lowest setting.
It’s great that the bowl is so large meaning you can make a big batch of ice cream; however, this means you do need plenty of room available in your freezer to freeze it beforehand, as it really is bulky (and heavy).
Putting the locking mechanism in place on the motor head is quite fiddly, and it doesn’t really feel secure when it’s in place; it takes more fiddling to get it to line up properly with the paddle. When the ice cream is ready, it makes a loud clicking noise – good for letting you know it’s ready, but it does sound like it’s about to break – although I’m sure it won’t.
It’s also strange having the ice cream being mixed without a lid or cover over it; personally I prefer having the mixture enclosed.
The ice cream was wonderfully smooth and creamy, with a consistent texture throughout. It takes about 30 minutes to make a batch.
Easy to use, but takes preparation and a cool head to get everything attached properly.
The Best Digital Ice Cream Maker
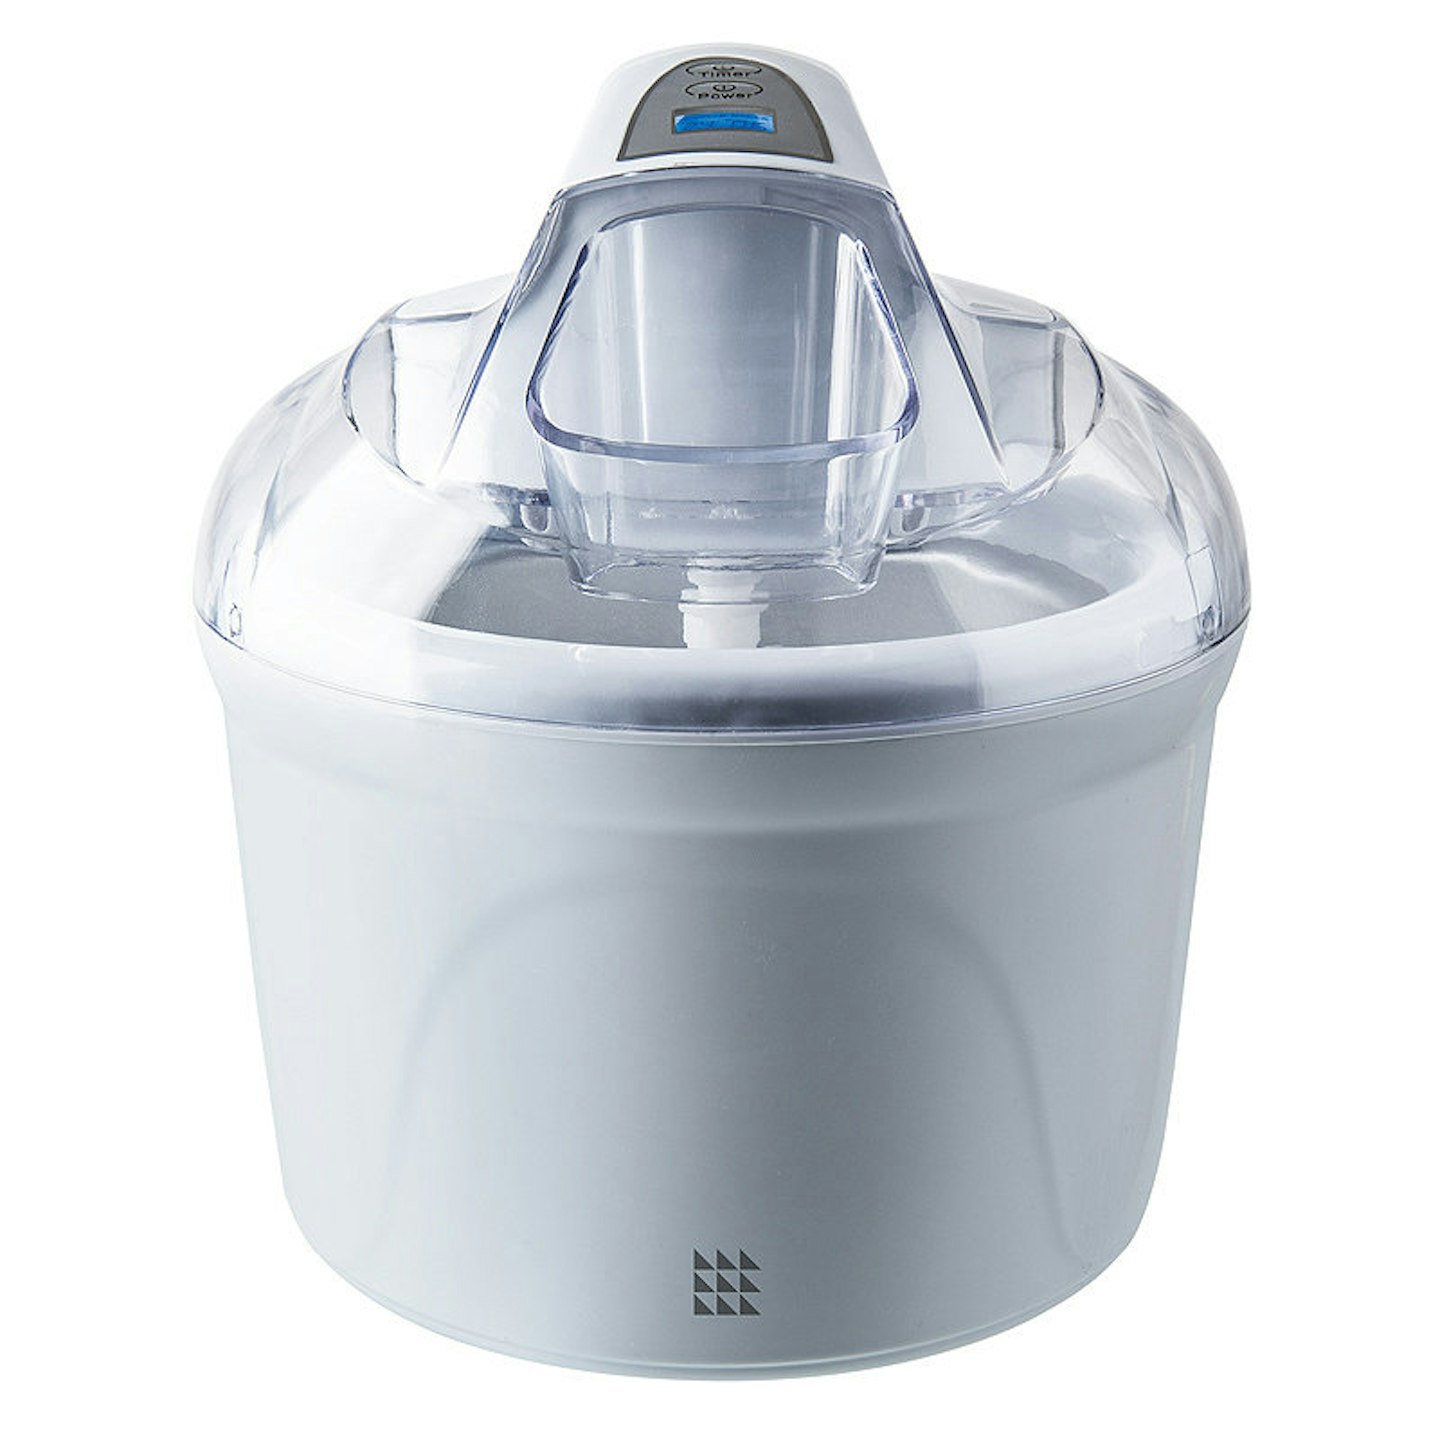
www.lakeland.co.uk
Specs:
• Churns ice cream, sorbet and frozen yogurt
• Makes 0.5 litres in as little as 30 minutes
• Ingredients can be added during churning
• Easy-to-read digital display
• Freeze bowl for 12hrs before use
• Recipes included
Lakeland Digital Ice Cream Maker: Review
Lakeland’s Digital Ice Cream maker is actually really straight forward to use. You pop the base of the four-part machine in the freezer 12 hours before you want to use it. Pre-make your mixture, pour into the opening at the front, set the timer and leave your mixture to be swirled into a delish ice cream.
The digital function on this machine was super easy to use and can be set with just the click of a button.
A couple of things to note; firstly make sure your mixture is chilled in the fridge for a half hour to a couple of hours prior (or use ingredients that have already been kept in fridge) to ensure your ingredients are churned efficiently into ice cream. If your mixture is warm it’ll take longer to churn. And secondly, ensure the paddle of the ice cream maker is turning before you pour your mixture into the filler opening.
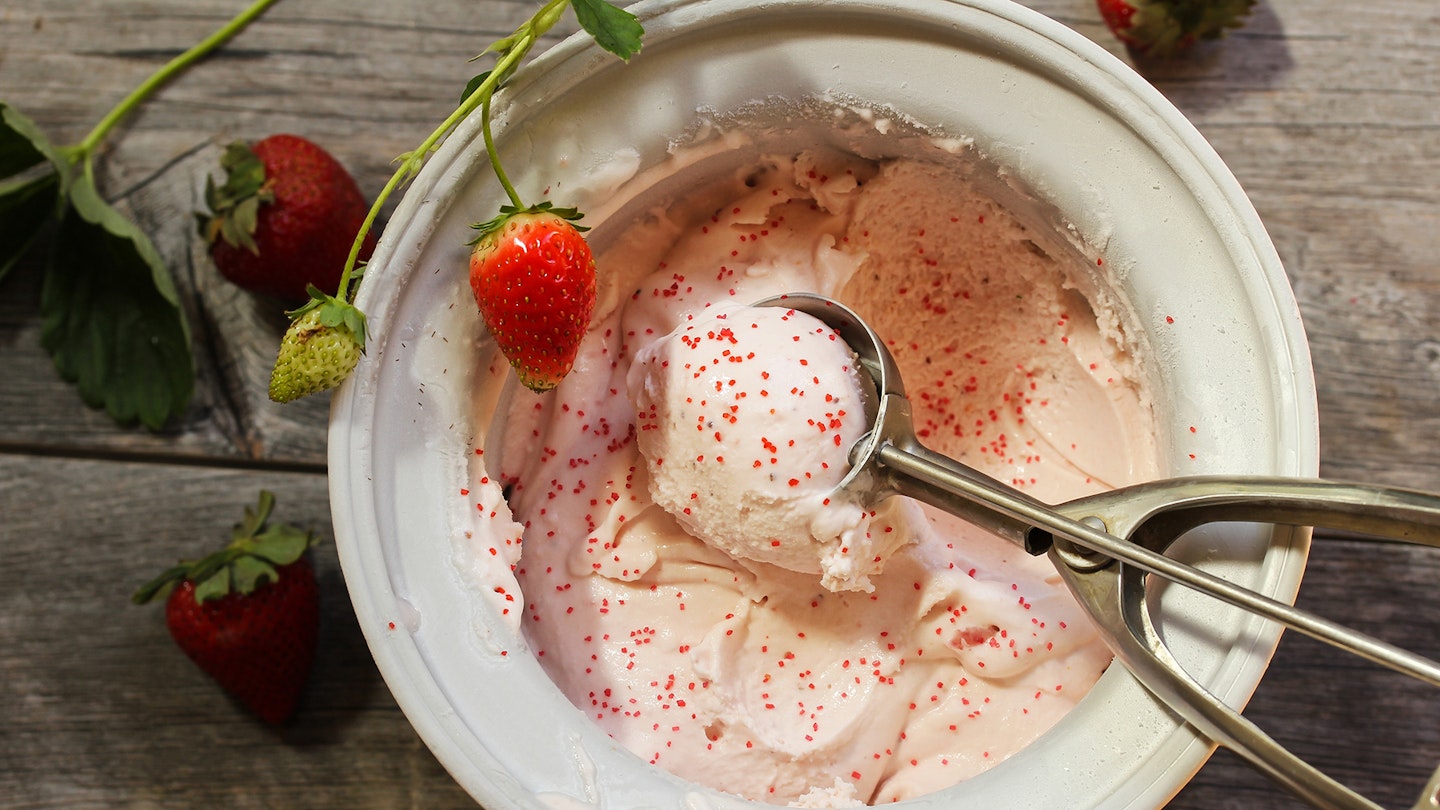
Lakeland’s nifty ice cream machine makes up to 1.5l of ice cream and sits in the kitchen without taking up too much space. On one occasion, I decided to make strawberry ice cream. The recipe came with the booklet supplied by Lakeland and was ready after 25 minutes of churning. Set yourself a fun evening to make some ice cream, this isn’t for parents who want to slapdash something together, it does take a bit of time and patience.
The Best Value For Small Portions
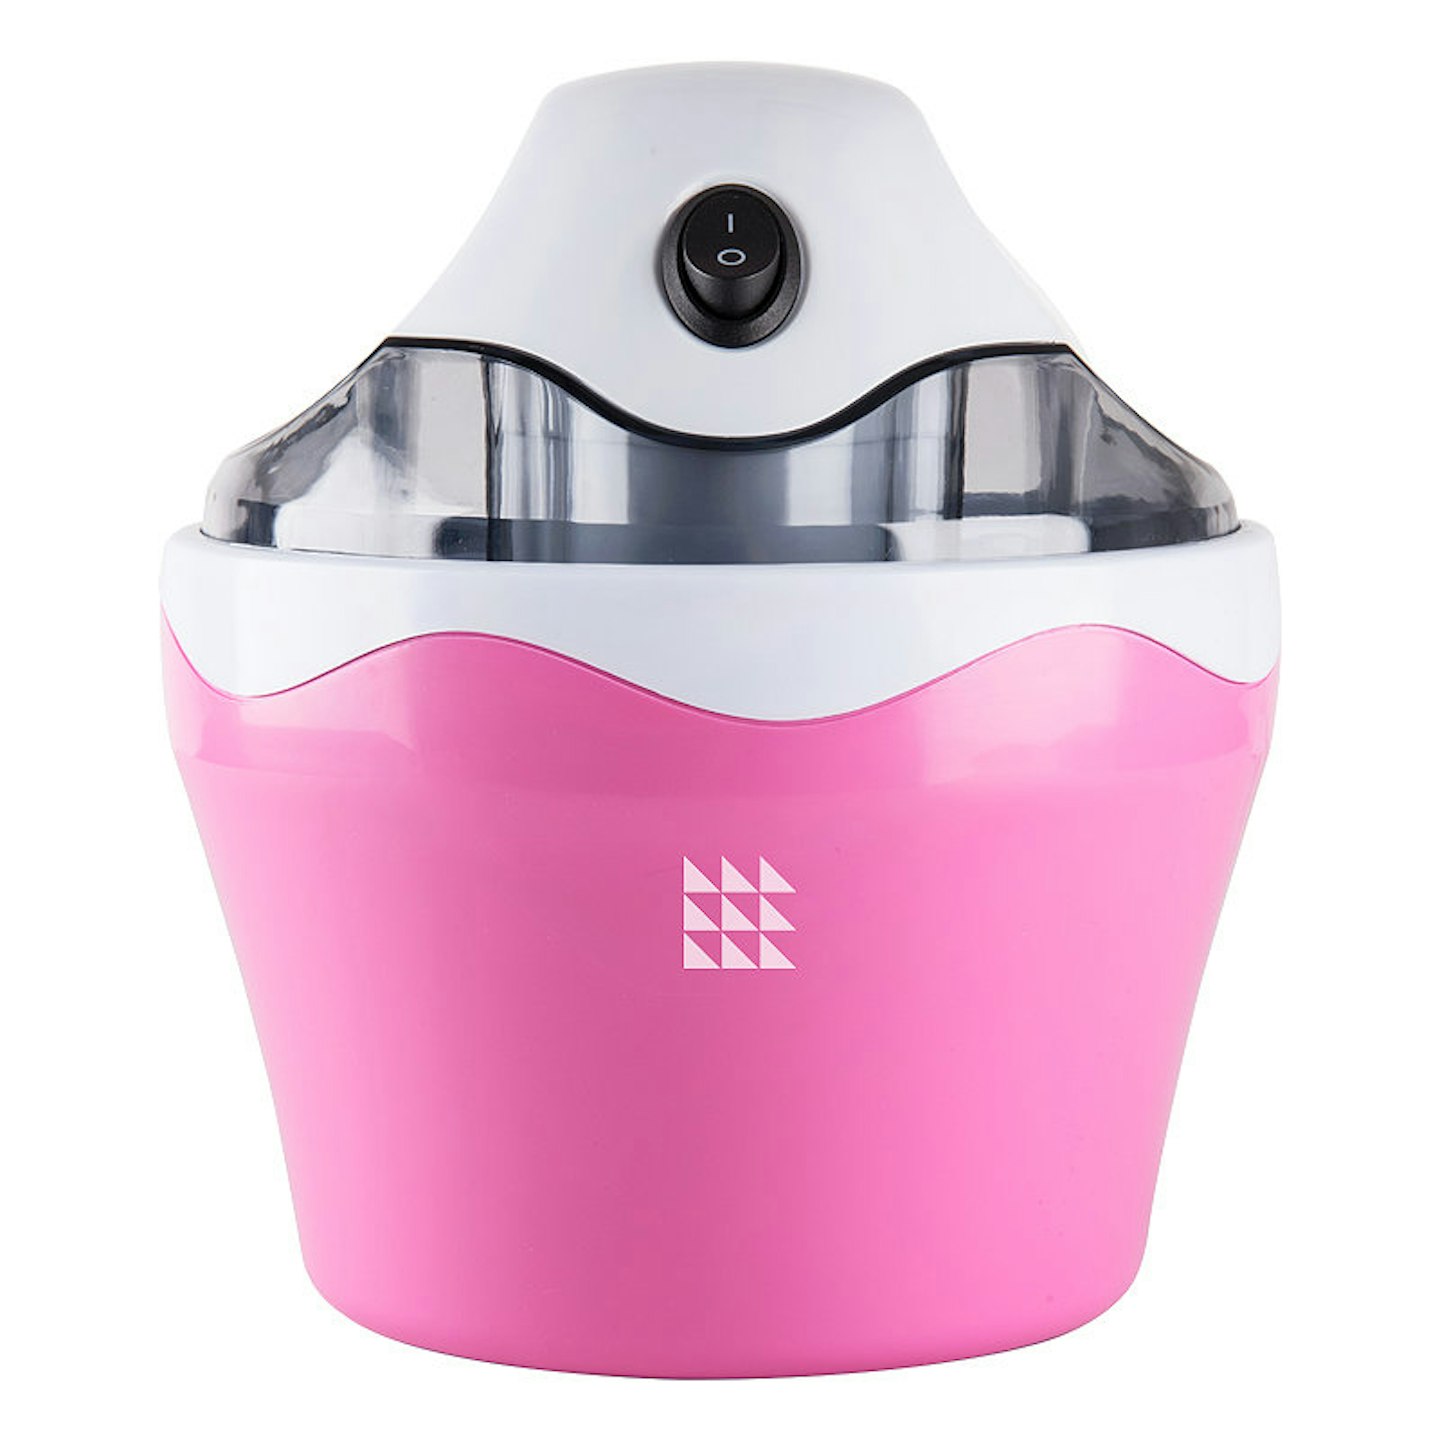
www.lakeland.co.uk
Specs:
• Makes a portion of ice cream in less than 30 minutes
• Bowl is small enough to tuck into freezer before use
• Ingredients can be added during churning
• Makes 1 portion (350ml)
Lakeland Mini Ice Cream Maker: Review
For such a small, four-part contraption, the Lakeland Mini Ice Cream maker was more complex to use than expected. Firstly, before you even think about using the pretty-in-pink machine, the base must go in the freezer overnight. As I've never made ice-cream before my preconceptions were, 'this will be easy'. Then I looked at the recommended recipes which came with the mini ice cream maker... simmering milk, eggs, several steps. With a toddler in tow I needed 'simple'. So I Googled a kid-friendly banana ice cream recipe.
After taking the base of the machine out of the freezer, putting the parts together (using a towel so my hands didn't freeze on to it) I turned the machine on so the paddle started moving first. Then I poured the mixture down one of the openings of the lid; being careful I didn't spill any, as these openings are quite small and proved a bit of a fiddly job.
Note to self, don't use warm or room temperature mixture, as this will prolong preparation time. One other note, do not pour more than 350ml of mixture into the bowl, to allow it room to expand.
When mixing, the paddle will turn one way, and once your ice cream is ready, the paddle turns in the opposite direction. After half an hour the paddle was still turning the same direction... I re-read the instruction manual which states you can also the mixture once the consistency looks ready – which I did.
The machine itself seems very well made and the consistency of the mixture created was of a soft serve type ice cream and was yum. A bit of a faff all together, but a fun faff nonetheless.
Other at-home ice cream gadgets
Not sure about investing in an ice cream machine yet? There are lots of other gadgets to help you enjoy iced treats at home - take a look at these:
At-home ice cream gadgets
 1 of 2
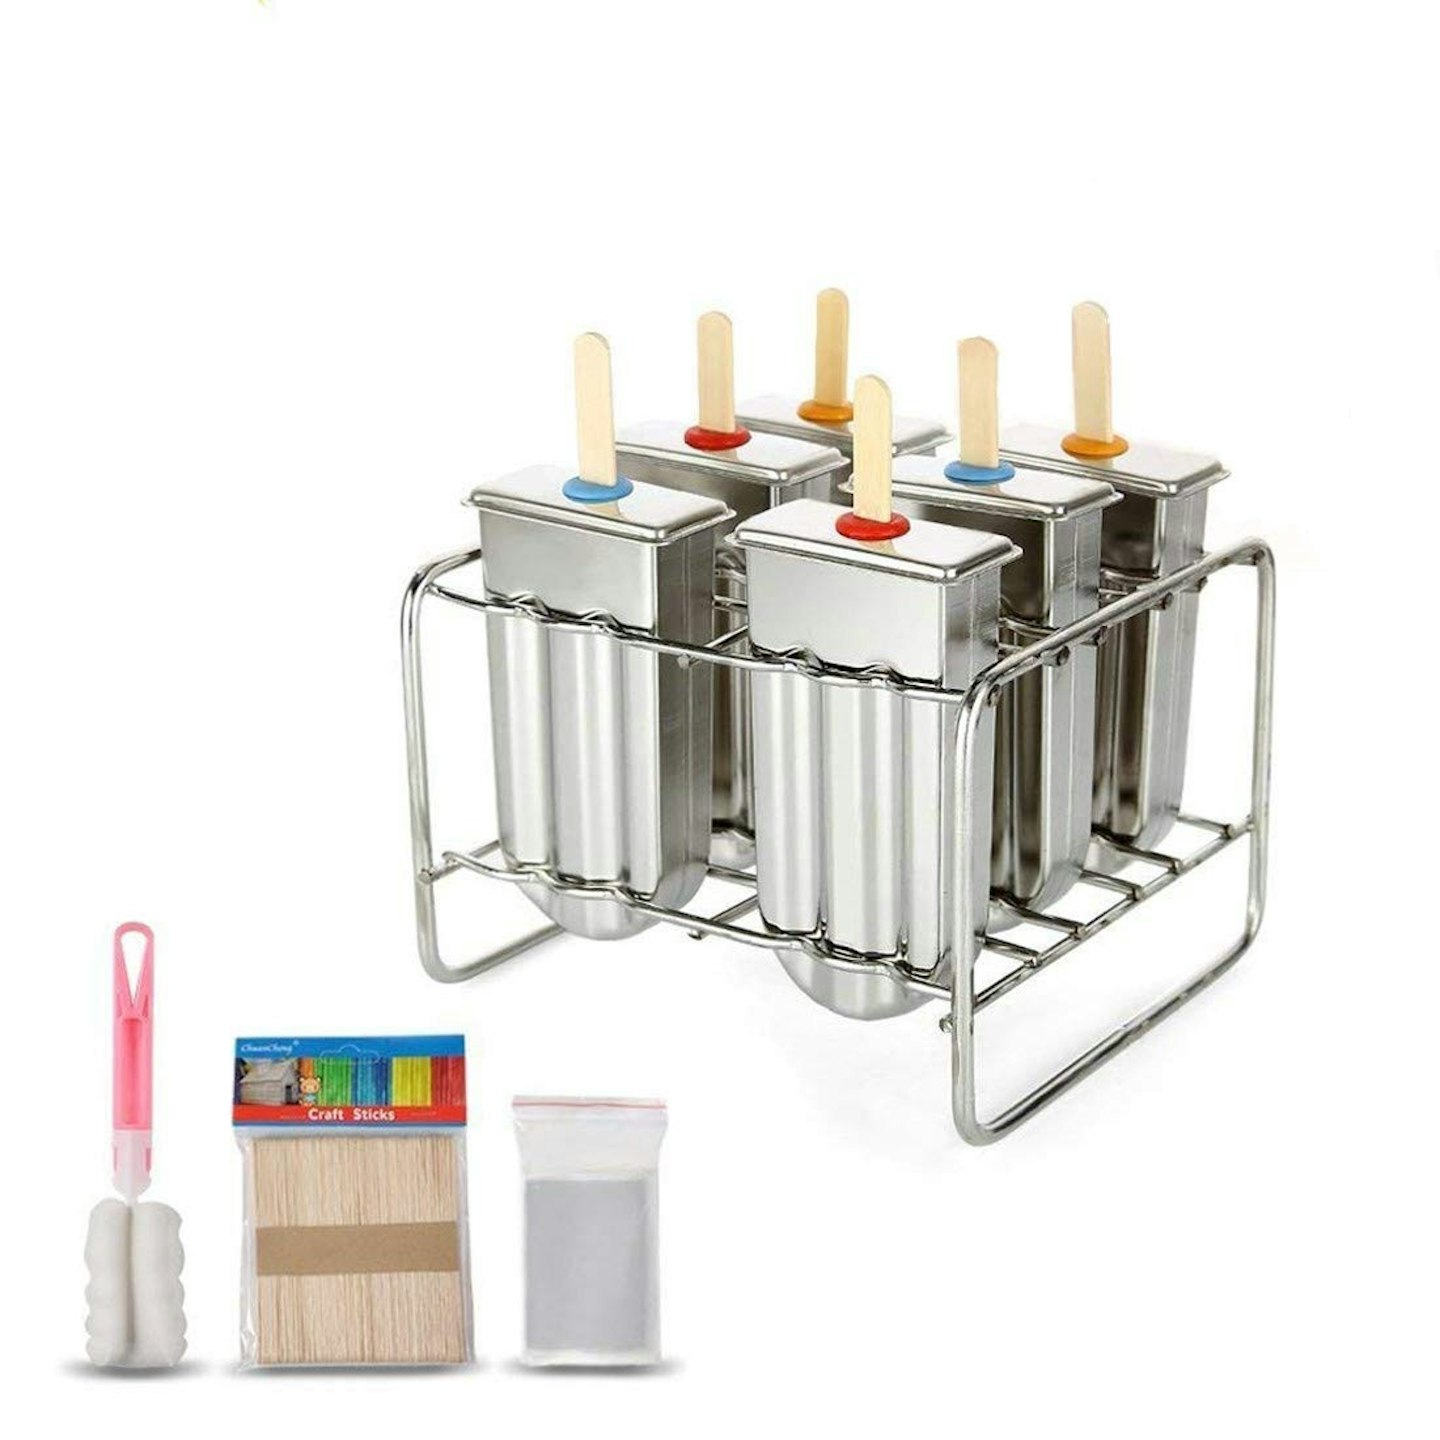
Ice Lolly Mould
For a simple option, choose an ice lolly mould to help you cool down during this heatwave. For a healthier option, cut up your favourite fruit and use a blender to mix it all together. Slowly pour the mixture into the stainless-steel base and leave it in a freezer. Just don't forget to add the stick.

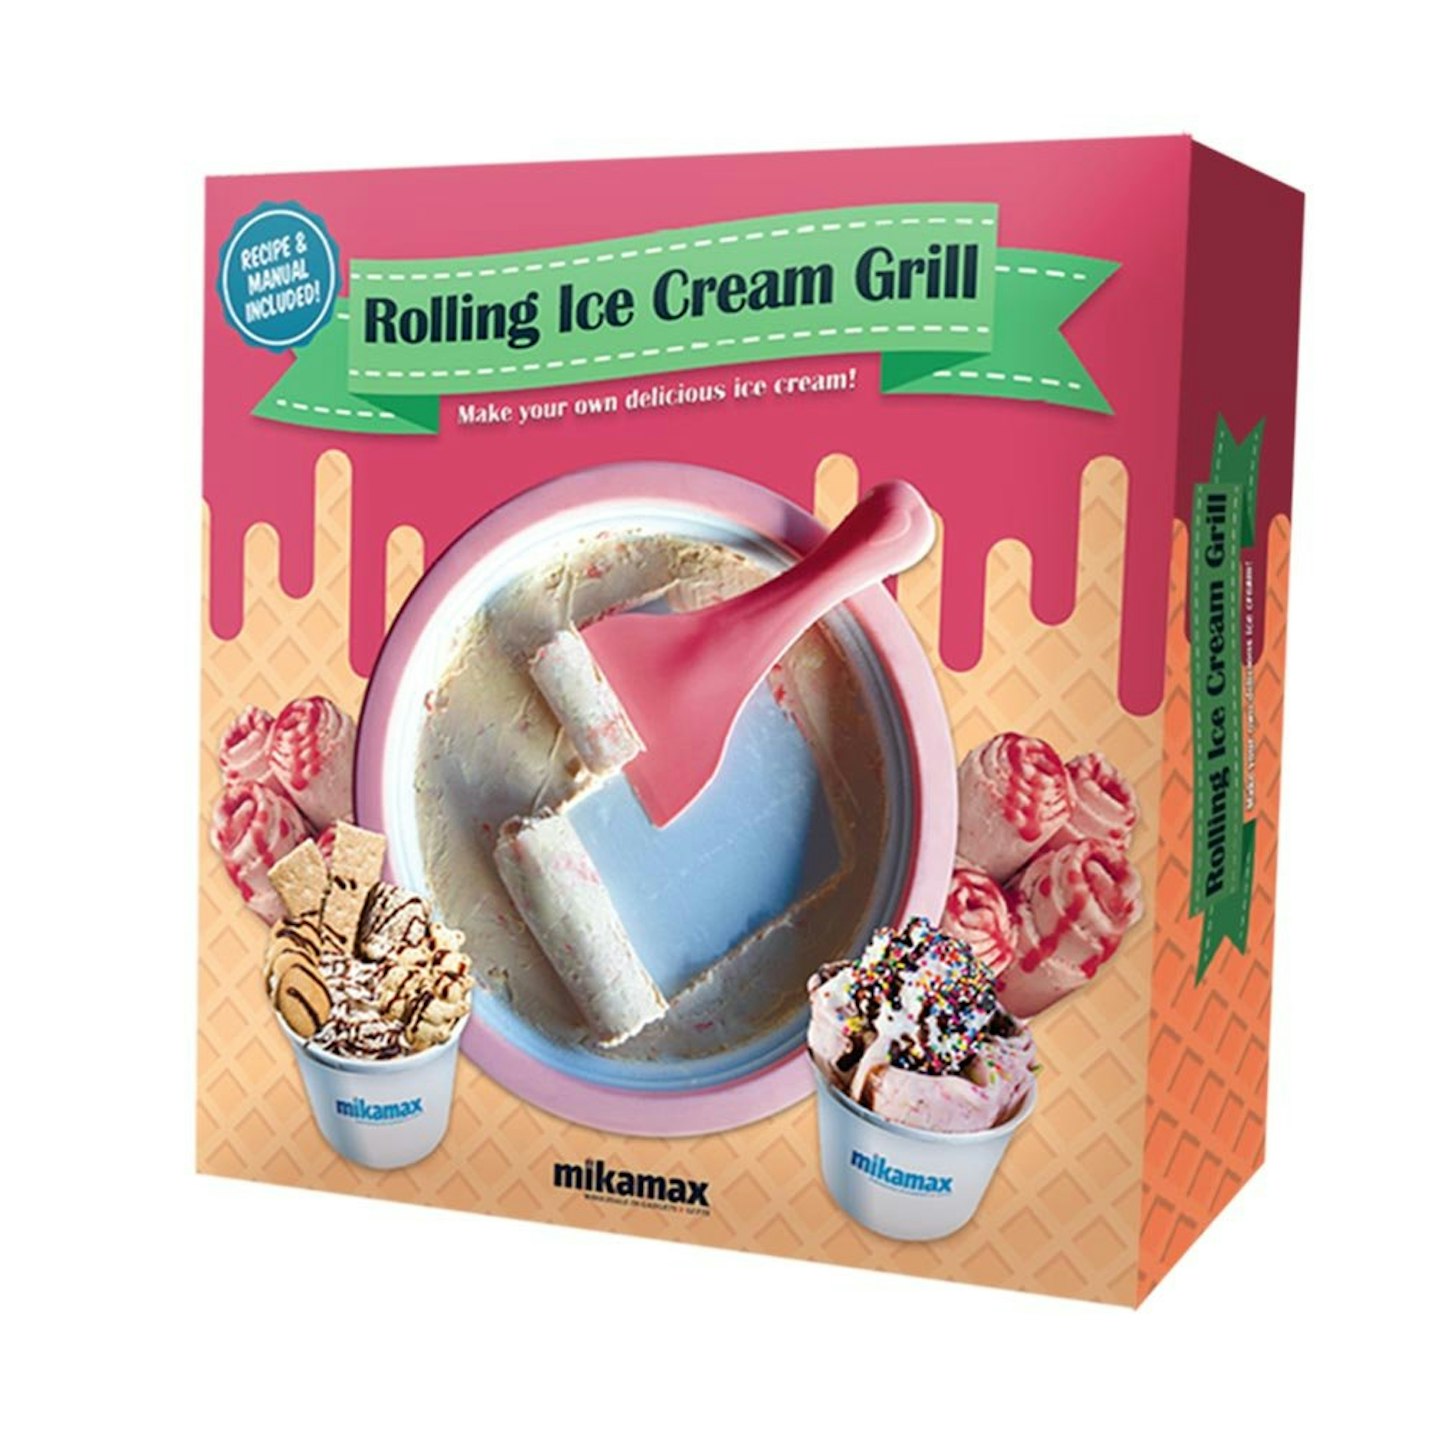 2 of 2
MikaMax Ice Cream Rolling Pan
You don't have to travel around the world to tuck into your very own rolled ice cream. This frozen dessert might have started out in Thailand, but with this rolling pan you can easily recreate it in your kitchen. Plus, you can save yourself save time researching what to make, as handy recipes are included.amazon.co.uk